How to Repaint Kitchen Cabinets
Kitchen cabinets are a major focal point in any kitchen and can significantly impact the overall aesthetics and functionality of the space. Over time, cabinets can show signs of wear and tear, such as scratches, dents, fading, or a build-up of grime. Repainting kitchen cabinets is a cost-effective way to refresh their appearance, give them a new lease on life, and revitalize the entire kitchen space. This guide provides a comprehensive overview of the steps involved in repainting kitchen cabinets successfully.
1. Preparation is Key
Before you even pick up a paintbrush, proper preparation is essential for a successful kitchen cabinet repaint. This step lays the groundwork for a smooth and long-lasting finish.
Empty and Clean Cabinets: The first step is to empty the cabinets completely and remove all doors and drawers. This allows for thorough cleaning and provides a clean surface for painting. Use a mild detergent and warm water to remove any grease, grime, or sticky residue. Dry the surfaces completely before proceeding to the next step.
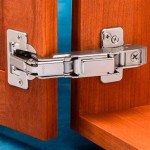
Remove Hardware: Carefully remove all cabinet hardware, including handles, knobs, hinges, and decorative accents. Be cautious not to lose any screws or small parts. Store them in labeled bags or containers to ensure easy reinstallation later.
Sanding and Priming: Sanding helps to create a smooth and even surface for the paint to adhere to. Use fine-grit sandpaper (120-150 grit) to lightly smooth any imperfections, scratches, or rough spots. After sanding, wipe down the surfaces with a damp cloth to remove dust and debris. Priming is crucial for ensuring paint adhesion, blocking stains, and creating a uniform surface. Choose a primer designed specifically for cabinets or wood surfaces.
2. Choosing the Right Paint
Selecting the right paint for your kitchen cabinets is a crucial step in achieving a durable and aesthetically pleasing finish.
Type of Paint: The most common types of paint used for kitchen cabinets are latex and oil-based. Latex paint is water-based, dries quickly, and is easier to clean up. However, it may not be as durable as oil-based paint. Oil-based paint provides a harder and more durable finish, but it takes longer to dry and requires mineral spirits for cleanup.
Finish: Opt for a semi-gloss or satin finish for kitchen cabinets. These finishes provide a durable, easy-to-clean surface that is less susceptible to fingerprints and smudges. A flat finish may be more prone to showing imperfections, while a gloss finish can highlight imperfections and may be too reflective for some kitchens.
Color Selection: Consider the existing color scheme of your kitchen, the style of your cabinets, and your personal preferences when choosing a color. If you are unsure about a color, try painting a small test area first to see how it looks in your kitchen's lighting.
3. Painting the Cabinets
With preparation complete, it's time to dive into the actual painting process. This involves applying primer and paint in a systematic and meticulous manner to achieve a smooth and professional finish.
Prime the Cabinets: Apply a thin and even coat of primer to all surfaces of the cabinets. Use a high-quality primer specifically designed for cabinets or wood surfaces. Allow the primer to dry completely before moving on to the next step.
Paint the Cabinets: Use a high-quality brush, roller, or spray gun to apply paint to the cabinets. Choose a brush or roller with bristles or nap designed for smooth surfaces. If using a spray gun, follow the manufacturer's instructions carefully and work in a well-ventilated area. Aim for thin and even coats, avoiding any drips or runs. Allow each coat to dry completely before applying the next.
Multiple Coats: For a more durable and even finish, apply at least two coats of paint. It's important to allow each coat to dry completely before applying the next. This ensures that the paint has time to cure and provides a smooth, even surface for the next coat.
Finishing Touches: After the final coat of paint has dried, apply a clear polyurethane sealant for added protection and durability. Polyurethane sealant is a clear, protective coating that helps to resist scratches, water damage, and UV rays. It can be applied with a brush, roller, or spray gun.
Repainting kitchen cabinets is a rewarding project that can significantly enhance the look and feel of your kitchen. By approaching the process with careful planning, proper preparation, and meticulous execution, you can give your cabinets a fresh new look and breathe new life into your kitchen space.

How To Paint Kitchen Cabinets The Love Notes Blog

Cabinet Refinishing Guide

How To Paint Kitchen Cabinets Like The Pros

Painted Kitchen Cabinets One Year Later The Palette Muse

How To Paint Kitchen Cabinets Like The Pros

How To Paint Kitchen Cabinets Forbes Home

Avoid These Mistakes How To Paint Cabinets That Are Already Painted Grace In My Space

Tips On How To Paint Kitchen Cabinets Cherished Bliss

How To Paint Inside Kitchen Cabinets Let S Furniture

How To Repaint Kitchen Cabinets Painted By Kayla Payne
Related Posts