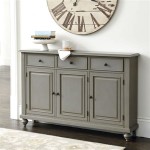
How To Make A Drawer For Cabinet
Building a drawer for a cabinet can be a rewarding woodworking project, allowing for customization and the satisfaction of crafting a functional piece. Whether you're seeking to replace a damaged drawer or enhance your cabinetry with new additions, this comprehensive guide will equip you with the knowledge and steps to create a durable and beautiful drawer for your cabinet.
Planning and Design Considerations
Before embarking on the construction process, meticulous planning is essential for a successful outcome. Start by taking accurate measurements of the cabinet opening to determine the necessary drawer dimensions. Consider the desired depth, width, and height of the drawer, ensuring adequate space for your intended use. If you're replacing an existing drawer, carefully study its construction to gain insights into the techniques employed and materials used.
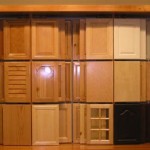
Decide on the desired drawer style, whether a simple box construction or a more elaborate design incorporating decorative elements. Consider the type of drawer slides to be used, as they will influence the drawer's functionality and overall aesthetics. For instance, side-mounted slides offer a traditional approach while undermount slides create a sleek, flush-mounted appearance.
Choose the wood species that aligns with your project's aesthetic and budget. Hardwood options like maple, cherry, or oak provide strength and durability, while softwoods such as pine or cedar offer affordability and a lighter aesthetic. Selecting the right wood thickness is critical for ensuring the drawer's structural integrity and preventing warping or sagging.
Materials and Tools
Gather the necessary materials and tools to ensure a smooth construction process. The following list provides a comprehensive overview of essential items:
- Wood (for drawer sides, front, back, and bottom)
- Drawer slides
- Wood glue
- Screws (for attaching sides, front, and back)
- Finishing nails (for attaching the drawer bottom)
- Wood filler (to hide screw holes and imperfections)
- Wood screws (for attaching drawer slides)
- Sandpaper (various grits for smoothing surfaces)
- Measuring tape
- Pencil
- Saw (circular, miter, or table saw)
- Drill
- Clamps
- Hammer
- Screwdriver
- Safety glasses
- Dust mask
Construction Steps
Once you have gathered your materials and tools, follow these step-by-step instructions to build your drawer:
1. Cut the Drawer Pieces
Using your chosen saw, precisely cut the wood to the desired dimensions for the drawer sides, front, back, and bottom. Pay close attention to accuracy, as any inconsistencies can lead to a misaligned drawer. Double-check the measurements before making each cut.
2. Assemble the Drawer Sides, Front, and Back
Apply wood glue along the edges of the drawer sides, front, and back. Clamp the pieces together, ensuring the corners are square and the joints are tight. Allow the glue to dry completely, following the manufacturer's instructions. Once the glue has set, secure the joints with screws for added strength and stability.
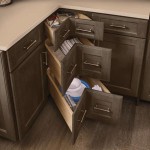
3. Attach the Drawer Bottom
Measure and cut the drawer bottom to fit snugly inside the assembled frame. Apply wood glue to the inside edges of the drawer frame, ensuring a consistent bead of glue along all four sides. Carefully place the drawer bottom onto the glued frame, making sure it aligns perfectly. Secure the bottom with finishing nails, driving them into the sides, front, and back of the frame. Avoid overdriving the nails, as this could cause damage to the wood.
4. Install the Drawer Slides
Attach the drawer slides following the manufacturer's instructions. If you are using side-mounted slides, measure and mark the desired positions on the drawer sides. Pre-drill pilot holes before securing the slides with screws. For undermount slides, attach them to the bottom of the drawer frame, ensuring they are centered and securely fastened.
5. Finish the Drawer
Sand the drawer surface with progressively finer grits of sandpaper to achieve a smooth finish. Fill any screw holes or imperfections with wood filler, allowing it to dry completely before sanding again. Apply your chosen finish, such as stain, paint, or varnish, to enhance the drawer's appearance and provide protection.
After the finish has dried, install the drawer into the cabinet, ensuring it slides smoothly and effortlessly. Adjust the drawer slides as needed to ensure proper alignment and functionality. With the drawer completed, you can now enjoy the fruits of your labor, adding convenience and style to your cabinet.

How To Make Drawers In 6 Easy Steps Fixthisbuildthat

How To Build Kitchen Cabinets Install Drawer Slides

How To Build Drawers A Complete Guide Drawer Making
:max_bytes(150000):strip_icc()/100505124-e9f1c4ce331345fb8f947576e821b1a0.jpg?strip=all "Make And Mount Super Simple Drawers")
Make And Mount Super Simple Drawers

Cabinet Drawers Made Easy Build Furniture The Way

Diy Drawer Cabinet Making And Installation Plans Available

How To Build A Drawer Box Come Stay Awhile By Amanda Vernaci Modern Farmhouse Diy Home Renovation

How To Build A Cabinet Drawer The Easiest Way Possible Sawdust Girl

Diy Drawer Cabinet Office Build Montreal

How To Build Drawers Easy Diy Drawer Boxes
Related Posts