How to Make a Built-In Corner Cabinet
Built-in corner cabinets maximize storage in often-underutilized spaces. They offer a custom look and can be tailored to fit specific needs. While the project requires intermediate woodworking skills, careful planning and execution can lead to a beautiful and functional addition to any room.
1. Planning and Design
Begin by meticulously measuring the corner where the cabinet will be installed. Note any obstructions, such as electrical outlets or plumbing fixtures. Consider the cabinet's intended use to determine the appropriate size and configuration of shelves and drawers. Sketch a detailed design including dimensions, shelf placement, and door style. This plan serves as the blueprint for the project.
Choosing the right materials is crucial. Typically, plywood is used for the cabinet box construction due to its stability and affordability. Select a hardwood, like oak or maple, for the face frame and doors for a more refined appearance. Determine the hardware requirements, such as hinges, drawer slides, and knobs or pulls, in advance.
2. Building the Cabinet Box
Cut the plywood pieces for the cabinet sides, top, and bottom according to the design plan. Accuracy in this step is paramount to ensure a square and stable cabinet. Use a table saw or circular saw for straight cuts, ensuring the blade is sharp for clean edges. Assemble the box using wood glue and screws. Clamps will be necessary to hold the pieces together while the glue dries. Reinforce joints with wood glue and screws for added strength. Pre-drilling screw holes prevents the wood from splitting.
For corner cabinets, the back piece may need to be angled or notched to accommodate the corner's shape. Carefully measure and cut the back piece to fit snugly. Consider using a thinner backing material, like hardboard, if the cabinet will be placed against an uneven wall.
3. Constructing the Face Frame
The face frame provides a decorative finish and a mounting point for the doors. Cut the stiles (vertical pieces) and rails (horizontal pieces) from the chosen hardwood. Join the pieces using pocket screws or dowels for a strong, concealed joint. Attach the face frame to the cabinet box using glue and finishing nails. Ensure the frame is flush with the front edges of the cabinet.
4. Building and Installing Shelves and Drawers
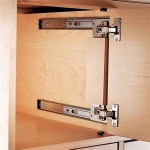
Cut the shelves from plywood or solid wood, depending on the desired aesthetic and load-bearing requirements. Install shelf supports using brackets or dadoes cut into the cabinet sides. For drawers, construct drawer boxes using dovetail joints or other suitable joinery methods. Drawer slides should be installed on the cabinet sides and the drawer boxes themselves. Ensure smooth and even operation of the drawers after installation.
5. Installing the Doors
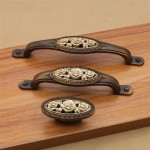
Measure and cut the cabinet doors from the selected hardwood. The doors can be a simple slab design or feature raised panels for a more traditional look. Rout or carve any desired details into the doors. Attach hinges to the doors and the face frame. Ensure the doors are properly aligned and swing freely. Install knobs or pulls for easy opening and closing.
6. Finishing Touches
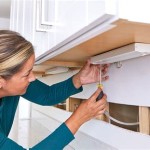
Sand all surfaces smooth, paying attention to any sharp edges. Apply a primer and then paint or stain the cabinet to the desired finish. Consider using a topcoat of polyurethane for added durability and protection. Install the cabinet into the corner, ensuring it is level and securely fastened to the wall studs. Caulking any gaps between the cabinet and the wall creates a seamless and professional look.
7. Customizations and Considerations
Corner cabinets can be customized to suit various needs. Consider incorporating features like lazy susans or pull-out shelves to maximize accessibility in deep corners. Lighting can be added to enhance visibility and functionality. For appliances like microwaves or ovens, ensure adequate ventilation and electrical access.
Safety should always be a priority. Wear appropriate safety glasses and hearing protection when operating power tools. Follow manufacturer's instructions for all materials and equipment. Ensure proper ventilation when working with finishes and adhesives.

Diy Corner Cabinet For Dining Room Tutorial Thrifty And Chic

Woodsmith Classic Corner Cabinet Standard Plan Premium Drawings

Diy Corner Cabinet For Dining Room Tutorial Thrifty And Chic

Corner Cupboard Ana White

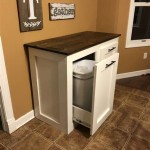
How To Build A Blind Corner Cabinet With Built In Drawers

How To Build A Custom Diy Built In Cabinet Angela Marie Made

36 Corner Base Easy Reach Kitchen Cabinet Basic Model Ana White

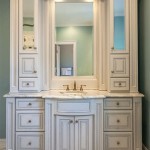
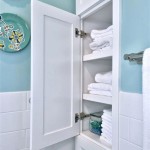
Diy Bathroom Corner Cabinet

5 Solutions For Your Kitchen Corner Cabinet Storage Needs

Diy Corner Cabinet With No Wasted Space Sawdust Girl
Related Posts