DIY Bathroom Sink Cabinet
A bathroom sink cabinet is more than just a functional storage space; it's a key design element that can significantly impact the overall aesthetic of a bathroom. Building a DIY bathroom sink cabinet allows for customization to specific needs and design preferences while potentially saving money compared to purchasing a pre-built unit. This article will guide readers through the process of building a basic bathroom sink cabinet.
Planning and Design
Before beginning construction, careful planning is crucial. Accurate measurements of the available space are essential. Consider the desired height, width, and depth of the cabinet, ensuring it accommodates the sink and plumbing while leaving sufficient clearance for comfortable use. Sketching a design on paper or using design software can help visualize the final product and identify potential issues before construction begins. Determining the style, such as traditional, modern, or rustic, will guide material and finish choices.
Material Selection
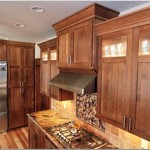
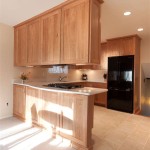
Common materials for bathroom sink cabinets include plywood, medium-density fiberboard (MDF), and solid wood. Plywood offers strength and moisture resistance, making it a suitable choice for bathroom environments. MDF is a cost-effective option with a smooth surface, ideal for painting. Solid wood provides a more luxurious appearance but requires more finishing work and can be susceptible to moisture damage if not properly sealed. Choosing the right material depends on budget, desired aesthetic, and skill level.
Necessary Tools
Gathering the necessary tools beforehand streamlines the construction process. Essential tools include a measuring tape, a circular saw or jigsaw, a drill, a screwdriver, wood glue, wood screws, safety glasses, and a dust mask. Clamps, a Kreg jig pocket hole system, and a sander can also be helpful for assembly and finishing. Having the right tools readily available ensures a smoother and more efficient building process.
Construction Steps
Begin by cutting the chosen material according to the planned dimensions. This includes the top, bottom, sides, and back panels of the cabinet. Use wood glue and screws to assemble the cabinet box, ensuring square corners and a sturdy structure. Reinforce joints with pocket holes for added strength if using a Kreg jig. Next, attach the face frame, which will provide a finished look and support for the cabinet doors. The face frame pieces should be cut and assembled similarly to the cabinet box.
Door and Drawer Construction (Optional)
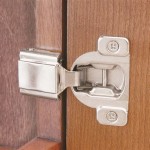
If the design includes doors or drawers, these should be constructed after the cabinet box and face frame are complete. Cabinet doors can be built using the same material as the cabinet box and attached using hinges. Drawers require drawer slides and careful construction to ensure smooth operation. Pre-made doors and drawers can be purchased as an alternative to building them from scratch, saving time and effort.
Finishing Touches
Once the cabinet is assembled, sanding all surfaces provides a smooth finish for painting or staining. Apply primer before painting to ensure even coverage and better adhesion. Multiple coats of paint or stain may be necessary for desired opacity and durability. Consider applying a sealant, especially if using solid wood, to protect the cabinet from moisture damage. Hardware, such as knobs or pulls, can be installed after the finish is dry.
Plumbing and Sink Installation
Before installing the cabinet, mark the locations for plumbing connections and ensure proper alignment with the existing plumbing lines. After positioning the cabinet, connect the plumbing fixtures according to manufacturer instructions. Finally, install the sink according to the manufacturer's guidelines, ensuring a secure and watertight seal. It is recommended to consult a professional plumber if there are any uncertainties regarding plumbing installation.
Customization and Variations
The basic construction process can be adapted to create various cabinet styles. Open shelving can be incorporated instead of doors for a more open feel. Adding decorative trim or molding can enhance the aesthetic appeal. Consider incorporating features like a toe kick for added comfort and a cleaner look. The possibilities for customization are vast, allowing for a truly unique and personalized bathroom vanity.
Safety Considerations
Throughout the entire process, prioritize safety. Always wear appropriate safety gear, including eye protection and a dust mask. Use power tools with caution and follow manufacturer instructions. Ensure adequate ventilation when working with paints, stains, and sealants. Taking necessary safety precautions will help prevent accidents and ensure a successful project.

10 Diy Bathroom Vanity Ideas The Family Handyman
:max_bytes(150000):strip_icc()/build-something-diy-vanity-594402125f9b58d58ae21158.jpg?strip=all "16 Diy Bathroom Vanity Plans You Can Build Today")
16 Diy Bathroom Vanity Plans You Can Build Today

How To Build A Diy Bathroom Vanity Angela Marie Made

How To Build A Diy Bathroom Vanity Angela Marie Made

Diy Bathroom Vanity 12 Rehabs Bob Vila

Diy Bathroom Vanity Ideas Perfect For Repurposers

Diy Bathroom Vanity For 65 Angela Marie Made
:max_bytes(150000):strip_icc()/angelamariemade-25a7476389d449129a7a726c162797a4.jpg?strip=all "25 Diy Bathroom Vanity Ideas Perfect For Storage")
25 Diy Bathroom Vanity Ideas Perfect For Storage

Rustic Bathroom Vanity Kreg Tool

Diy Vanity For Wall Mount Sink Jaime Costiglio
Related Posts