How To Install a Bathroom Cabinet In a Wall
Installing a bathroom cabinet provides valuable storage and enhances the overall aesthetic of the space. While seemingly complex, the process is manageable with the right tools, preparation, and a step-by-step approach. This guide outlines the procedures involved in securely and effectively mounting a bathroom cabinet on a wall.
1. Gathering Necessary Tools and Materials: Before beginning installation, it is essential to gather all the necessary tools and materials. This includes the bathroom cabinet, a stud finder, measuring tape, pencil, level, drill with appropriate drill bits (including a countersinking bit if necessary), screwdriver, wall anchors (if not mounting directly to studs), screws suitable for the wall type and cabinet weight, safety glasses, and a dust mask.
2. Locating and Marking Wall Studs: Locating the wall studs is crucial for secure cabinet installation. A stud finder electronically detects studs behind the drywall. Mark the location of each stud within the area where the cabinet will be mounted. These markings will serve as guides for screw placement, ensuring maximum support.
3. Determining Cabinet Placement: Carefully consider the desired height and position of the cabinet. Standard bathroom vanity heights range, but individual preferences and plumbing configurations may dictate specific placement. Measure and mark the cabinet's outline on the wall using a level to ensure it hangs straight. Confirm that the marked location aligns with the previously identified wall studs if mounting directly to them.
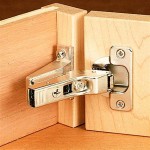
4. Preparing the Cabinet for Installation: Depending on the cabinet design, some preparatory steps may be necessary. If the cabinet requires assembly, carefully follow the manufacturer's instructions. Some cabinets have pre-drilled mounting holes; if yours does not, measure and mark appropriate positions on the back of the cabinet, ensuring they align with the marked stud locations on the wall. It is often helpful to use a template for accuracy, especially with heavier cabinets.
5. Pre-Drilling Pilot Holes (If Necessary): Pre-drilling pilot holes, especially in hardwood studs, prevents splitting and makes screw insertion smoother. The pilot hole should be slightly smaller than the screw's diameter. If the cabinet back is particularly thick, consider using a countersinking bit to create a recess for the screw head, allowing it to sit flush with the cabinet back.
6. Mounting the Cabinet to the Wall: Position the cabinet against the wall, aligning the pre-drilled holes (or the cabinet back itself) with the marked stud locations. Using the appropriate screws, drive them through the cabinet back and into the studs. Use a screwdriver or drill to tighten the screws securely, ensuring the cabinet is firmly attached to the wall. If the screws are too long, they can be adjusted or replaced with shorter ones to prevent damage to the wall or the cabinet's interior.
7. Using Wall Anchors (If Not Mounting to Studs): If mounting directly to studs is not feasible, suitable wall anchors are required. Different wall types require different anchors. Toggle bolts are often recommended for heavier cabinets mounted in hollow walls, while plastic anchors may suffice for lighter cabinets. Drill appropriately sized holes for the chosen anchor type, insert the anchors, and then attach the cabinet using screws designed for use with those specific anchors.
8. Checking for Level and Stability: Once the cabinet is mounted, use a level to verify that it is hanging straight both horizontally and vertically. Apply gentle pressure to various points on the cabinet to ensure it is securely attached and does not wobble. Adjust screws or anchors as necessary to achieve optimal stability. Address any instability immediately to prevent future issues.
9. Completing the Installation: After ensuring the cabinet is securely mounted and level, proceed with any remaining installation steps. This might include attaching doors, shelves, or drawers, connecting plumbing fixtures if applicable, and sealing any gaps between the cabinet and the wall with caulk. Caulking provides a finished look and helps prevent moisture damage.
10. Final Inspection and Adjustments: Conduct a final inspection to ensure all components are correctly installed and functioning properly. Check for any loose screws or gaps. Make any necessary adjustments to ensure the cabinet is securely fastened and operating as intended. Regularly inspect the cabinet and its mounting hardware to maintain its stability and longevity.
This information is for general guidance only and does not constitute professional advice. Consulting with a qualified contractor is recommended for complex installations or if there are any uncertainties regarding the specific requirements of a particular project. Always adhere to local building codes and regulations. Manufacturers’ instructions should be consulted and followed throughout the installation process. Prioritize safety and utilize appropriate safety equipment throughout the project.

How To Install A Medicine Cabinet The Home Depot

How To Hang A Cabinet Do It Yourself Install

How To Install A Medicine Cabinet The Home Depot

How To Install A Medicine Cabinet The Home Depot

How To Install A Medicine Cabinet The Home Depot

How To Install A Bathroom Cabinet On Plasterboard Wall

How To Install A Recessed Medicine Cabinet Hunker

How To Install A Medicine Cabinet

How To Install A Surface Mount Medicine Cabinet Signature Hardware

Install A Recessed Or Surface Medicine Cabinet
Related Posts