How To Install A Medicine Cabinet In Wall
Installing a medicine cabinet provides valuable storage and enhances bathroom functionality. This guide outlines a comprehensive process for successfully installing a medicine cabinet in a wall.
Planning and Preparation
Before beginning the installation, careful planning and preparation are essential. The first step is to select a suitable location. Consider factors such as proximity to the vanity, lighting, and existing plumbing or electrical lines. Avoid placing the cabinet directly above electrical outlets or switches.
Once a location is chosen, measure the cabinet dimensions carefully. Transfer these measurements to the wall, marking the cabinet's outline with a pencil. Use a stud finder to locate and mark the wall studs within the outlined area. This information is crucial for secure mounting.
Next, assess the wall type. Drywall is the most common material, but other materials, such as tile or plaster, might require specialized tools and techniques. Also, check for any existing obstructions behind the wall, such as pipes or wiring, using a dedicated inspection camera if necessary.
Gathering Necessary Tools and Materials
Having the right tools and materials readily available streamlines the installation process. Essential tools include a measuring tape, level, stud finder, pencil, safety glasses, drill with appropriate drill bits (including a hole saw if necessary), screwdriver, and a utility knife. Additional tools, such as a jigsaw or reciprocating saw, might be needed for modifications to the wall framing.
Materials required include the medicine cabinet itself, mounting hardware (typically included with the cabinet), wood shims, wood screws, and construction adhesive (optional but recommended). Ensure the mounting hardware is appropriate for the wall type.
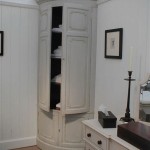
Cutting the Opening (If Needed)
If installing a recessed medicine cabinet, a wall opening is required. Double-check the cabinet’s rough-in dimensions against the marked outline on the wall. Using a utility knife, score the outline deeply to prevent drywall tearing. Then, carefully cut along the scored lines with a drywall saw. For tile walls, a diamond-grit blade is recommended. If the cabinet requires a larger opening than the existing space allows, modifications to the wall framing may be necessary. This involves using a reciprocating saw to carefully cut and remove sections of framing, ensuring structural integrity is maintained.
Wiring (If Applicable)
If the medicine cabinet includes lighting or electrical outlets, wiring must be properly connected. First, turn off the power to the circuit at the breaker box. Run the necessary wiring through the designated knockouts in the cabinet and connect them to the house wiring, following local electrical codes. Securely fasten the wiring with appropriate connectors and ensure proper grounding. Once the wiring is complete, have a qualified electrician inspect the connections before restoring power.
Mounting the Cabinet
With the opening prepared and wiring completed, the cabinet can be mounted. Apply construction adhesive to the back edges of the cabinet for added stability. Carefully position the cabinet within the opening, ensuring it is flush with the wall surface. Use a level to check for both vertical and horizontal alignment. Once positioned correctly, secure the cabinet to the wall studs using the provided mounting hardware or appropriately sized wood screws. If needed, use wood shims to achieve perfect alignment and a tight fit against the wall. Tighten the screws gradually to avoid damaging the cabinet or wall.
Finishing Touches
After securing the cabinet, install any shelves or other internal components according to the manufacturer’s instructions. Apply a bead of caulk around the perimeter of the cabinet where it meets the wall. This seals any gaps and prevents moisture intrusion. Finally, install the cabinet door, ensuring it opens and closes smoothly. Clean any excess caulk or debris from the cabinet and surrounding area.
Surface-Mounted Cabinet Installation
For surface-mounted cabinets, the process is simpler. After planning and gathering materials, locate the wall studs. Hold the cabinet against the wall in the desired location and mark the stud locations on the back of the cabinet. Pre-drill pilot holes at these marked points. Apply construction adhesive to the back of the cabinet, position it on the wall, and secure it using screws driven into the wall studs through the pre-drilled holes. Ensure the cabinet is level during installation.
Tips for Success
Several tips can contribute to a successful installation. Always double-check measurements to avoid costly mistakes. Use appropriate safety gear, including safety glasses and gloves. If unsure about any aspect of the installation process, consult a qualified professional. Following these steps and tips will ensure a successful and secure installation of the medicine cabinet, enhancing both the functionality and aesthetics of the bathroom.

How To Install A Medicine Cabinet The Home Depot

Building A Recessed Medicine Cabinet

How To Install A Medicine Cabinet The Home Depot

How To Install A Medicine Cabinet The Home Depot

How To Install A Medicine Cabinet The Home Depot

How To Make And Install A Medicine Cabinet Queen Bee Of Honey Dos

How To Install A Medicine Cabinet The Home Depot

How To Install A Medicine Cabinet The Home Depot

How To Install A Recessed Medicine Cabinet Hunker

7 Steps To Installing A Recessed Medicine Cabinet
Related Posts