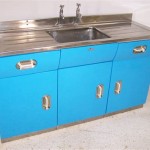
How to Install Cabinet Handles with a Template in Revit
Installing cabinet handles is a crucial step in completing any kitchen or bathroom renovation. While it may seem like a simple task, using a template to ensure precise and consistent handle placement can save you time and hassle in the long run.
Step 1: Gather Your Tools and Materials
Before you begin, gather the following tools and materials:
- Cabinet handles
- Template
- Measuring tape
- Pencil
- Screwdriver or drill
- Screws
Step 2: Find the Center of the Cabinet Door
Using a measuring tape, measure the height and width of the cabinet door. Divide these measurements by two to find the center point. Mark this point lightly with a pencil.
Step 3: Position the Template
Align the template over the center point of the cabinet door. Ensure that the template is level and centered both horizontally and vertically.
Step 4: Mark the Screw Holes
Use a pencil to mark the screw holes through the template onto the cabinet door. Remove the template and double-check the accuracy of the markings.
Step 5: Predrill the Holes
If your cabinet handles require predrilled holes, use the appropriate drill bit to create pilot holes at the marked locations. This will make it easier to insert the screws.
Step 6: Install the Handles
Insert the screws through the handles and into the predrilled holes. Tighten the screws firmly but avoid overtightening. You may need to adjust the tension of the screws based on the type of handles you are installing.
Step 7: Check the Alignment
Once all the handles are installed, step back and check the overall alignment. Make any necessary adjustments to ensure that the handles are both functional and aesthetically pleasing.
Tips for Using a Template
- Use a dedicated cabinet handle template designed specifically for the handle you are installing.
- Ensure that the template is in good condition and free of any damage or distortion.
- Double-check the measurements and markings before drilling holes.
- Use a level to ensure that the template is positioned correctly.
- If you are not comfortable installing the handles yourself, consider hiring a professional cabinet installer.
Conclusion
Using a template to install cabinet handles is a simple and effective way to achieve precise and consistent results. By following these steps carefully, you can ensure that your cabinet handles are properly aligned and enhance the overall look of your kitchen or bathroom.

Cabinetry Plug In For Revit 2025 Tutorial

Revit Tutorial Kitchen Cabinet Part 5 Door

Solved What Is The Best Way To Create Casework Families Autodesk Community

Revit Tutorial Kitchen Cabinet Part 1 Full Parametric

Solved How To Make A Door Handle Relative The Top Corner Of Parametric Autodesk Community

Revit Tutorial Kitchen Cabinet Part 1 Full Parametric

I Standard Revit Cabinets Template

Solved Base Cabinet Symbolic Lines Not Showing In Some Cabinets Autodesk Community

Revit Tutorial Kitchen Cabinet Part 1 Full Parametric

Training S Cabinets For Revit
Related Posts