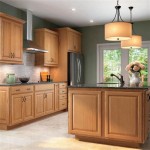
How to Dress Up Cabinet Doors With Trim
Cabinet doors are a key element of any kitchen or bathroom, and they can add a lot of style and personality to a room. If you're looking for a way to update your cabinets without replacing them, adding trim is a great option. Trim can be used to frame the doors, add detail, and create a more finished look.
There are many different types of trim available, so you can find something that will match your personal style and the décor of your home. You can choose from simple moldings to more elaborate designs, and you can even paint or stain the trim to match your cabinets or walls.
Adding trim to cabinet doors is a relatively easy project that can be completed in a few hours. However, it is important to take your time and measure carefully to ensure that the trim fits properly.
Materials You'll Need:
Instructions:
1. Measure and cut the trim. The first step is to measure and cut the trim to the correct size. To do this, measure the width and height of the cabinet door, and then add the desired amount of overlap to each side. For example, if you want the trim to overlap the door by 1/2 inch on each side, you would add 1 inch to the width and height of the door. Once you have the measurements, cut the trim to the correct size using a mitre saw or coping saw. If you are using a mitre saw, be sure to set the saw to a 45-degree angle. 2. Apply wood glue to the trim. Once the trim is cut to size, apply a thin layer of wood glue to the back of the trim. Be sure to apply the glue evenly, and do not use too much, as this can make the trim difficult to work with. 3. Position the trim on the cabinet door. Carefully position the trim on the cabinet door, aligning it with the edges of the door. Once the trim is in place, press down firmly to adhere it to the door. 4. Secure the trim with brad nails or finishing nails. Once the trim is in place, secure it with brad nails or finishing nails. Drive the nails through the trim and into the cabinet door, spacing them evenly apart. Be sure to countersink the nails slightly below the surface of the trim. 5. Fill the nail holes and sand the trim. Once the trim is secured, fill the nail holes with wood filler. Allow the wood filler to dry completely, and then sand it smooth. Be sure to use a fine-grit sandpaper to avoid scratching the trim. 6. Paint or stain the trim (optional). If you want to paint or stain the trim, do so at this time. Allow the paint or stain to dry completely before using the cabinets. Tips:
From Drab To Fab Adding Trim Cabinets

How To Add Trim Plain Doors The Painted Hive

10 Simple Ideas To Update Your Kitchen Cabinets Jenna Sue Design

Diy Fluted Cabinet Doors Jenna Sue Design

Adding Character To Cabinet Doors Timeless Creations

From Drab To Fab Adding Trim Cabinets

10 Simple Ideas To Update Your Kitchen Cabinets Jenna Sue Design

Pin Page

5 Ways To Install Molding Upgrade Your Home

7 Ways To Make Your Kitchen Cabinets Look Expensive
Related Posts

