How To Install Wired Under Cabinet Lighting
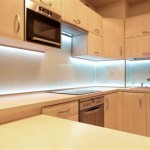
Under-cabinet lighting is a popular choice for homeowners looking to enhance the functionality and aesthetics of their kitchen or bathroom. Wired under-cabinet lights offer several advantages over battery-powered options, including brighter illumination, longer lifespan, and a more integrated look. Installing wired under-cabinet lighting requires some basic electrical knowledge and tools, but it’s a project that most DIY enthusiasts can tackle successfully.
This article provides a step-by-step guide to installing wired under-cabinet lighting, covering essential considerations, safety precautions, and troubleshooting tips. Following these instructions will help you achieve a professional-looking installation and enjoy the benefits of brighter, more functional lighting.
1. Planning and Preparation
Before embarking on the installation, careful planning is crucial. First, determine the desired length of lighting and the number of lights required. Take accurate measurements of the area where the lights will be installed. Consider the type of lighting fixture, such as LED strips, puck lights, or linear fixtures. Each option has its own set of advantages and disadvantages in terms of brightness, aesthetics, and cost.
Next, assess the existing electrical wiring in the area. If you are working with an existing electrical outlet, determine the available amperage and ensure it’s sufficient to handle the lighting load. Remember to consult the fixture’s specifications to determine its wattage and current draw.
For installations that require running new wiring, consider the following:
- Location of the junction box: Choose a suitable location for the junction box, which will house the wiring connections. Ensure the junction box is accessible for future maintenance or repairs.
- Wire gauge: Select the appropriate wire gauge based on the lighting load and the distance between the power source and the fixture.
- Conduit: If necessary, install conduit to protect the wiring and meet local electrical codes.
Finally, gather the necessary tools and materials, including:
- Voltage tester
- Wire strippers
- Wire cutters
- Screwdrivers
- Drill and drill bits
- Level
- Measuring tape
- Electrical tape
- Wire connectors
- Junction box
- Under-cabinet lighting fixtures
- Electrical wire (if necessary)
2. Installation Steps
Once you have completed the planning and preparation steps, follow these instructions for installing wired under-cabinet lighting:
- Turn off power: Before starting any electrical work, always turn off the power at the circuit breaker for the area where you will be working.
- Mount the junction box: If you are running new wiring, mount the junction box to the wall or ceiling near the lighting fixture.
- Run wiring: If necessary, route the electrical wire from the power source to the junction box and then to the lighting fixture. Use conduit to protect the wiring and ensure a safe and professional installation.
- Connect the wires: At the junction box, connect the wires coming from the power source to the wires leading to the lighting fixture. Ensure proper polarity, connecting the black wire (hot) to the black wire, the white wire (neutral) to the white wire, and the bare wire (ground) to the green or bare ground wire. Secure the wire connections using wire connectors.
- Mount the lighting fixture: Mount the lighting fixture to the underside of the cabinet using the provided hardware. Make sure the fixture is level and securely attached.
- Connect the fixture to the junction box: Connect the wires coming from the junction box to the terminals on the lighting fixture. Again, ensure proper polarity and secure the connections with wire connectors.
- Test the fixture: Turn the power back on at the circuit breaker and test the lighting fixture. Make sure the lights turn on and operate as expected.
- Clean up: Clean up the work area, removing any leftover debris or tools.
3. Troubleshooting and Safety
During the installation process, you may encounter some common problems. If the lights don’t turn on, check the following:
- Power: Ensure the power switch is turned on at the circuit breaker.
- Connections: Verify that all wire connections at the junction box and fixture are secure and properly connected.
- Fixture: Ensure the fixture itself is working properly and the bulbs are not faulty.
- Wiring: Inspect the wiring between the power source and the fixture for any breaks or damage.
When working with electricity, safety is paramount. Always follow these safety precautions:
- Turn off the power: Before working on any electrical wiring, always turn off the power at the circuit breaker. Double-check that the power is off using a voltage tester.
- Use proper tools: Use insulated tools when working with electricity. This will help prevent electrical shocks.
- Be careful: Be cautious when working with wiring and avoid touching live wires or terminals.
- Call an electrician: If you are not comfortable working with electrical wiring or have any doubts about your abilities, call a qualified electrician to perform the installation.

How To Install Under Cabinet Lighting In Your Kitchen Diy

How To Install Under Cabinet Lighting The Home Depot

How To Install Under Cabinet Lighting The Home Depot

How To Install Under Cabinet Lighting

How To Install Under Cabinet Lighting In Your Kitchen Diy

How To Install Under Cabinet Lighting The Home Depot

How To Install Under Cabinet Lighting
How To Install Hardwired Under Cabinet Lighting Solving The Puzzle

How To Create Under Cabinet Lighting That Will Impress Your Guests

88light How Do I Install Led Under Cabinet Lights On One Power Source With Gaps Between The Cabinets
Related Posts

