Can You Stain Honey Oak Cabinets?
Honey oak cabinets are a popular choice for many homeowners as they offer a warm and inviting look. However, over time, these cabinets can start to look dated or worn. If you're looking to update your honey oak cabinets without replacing them, staining them is a great option.
While staining honey oak cabinets is a relatively simple process, there are a few things you need to keep in mind to ensure the best results. In this article, we'll provide you with step-by-step instructions on how to stain honey oak cabinets, as well as some tips and tricks to help you achieve the perfect finish.
Before you begin, it's important to gather all of the necessary supplies. You will need:
- Sandpaper (120-grit and 220-grit)
- Tack cloth
- Wood stain
- Foam brush or rag
- Polyurethane finish
- Clean rags
- Dust mask
- Safety glasses
Once you have all of your supplies, you can begin the staining process.
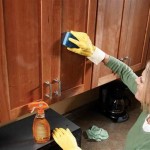
Step 1: Prepare the Cabinets
The first step is to prepare the cabinets for staining. This involves sanding the cabinets to remove any existing finish or dirt. Start with 120-grit sandpaper and sand in the direction of the wood grain. Once you have sanded the cabinets with 120-grit sandpaper, switch to 220-grit sandpaper and sand the cabinets again. This will help to smooth out the surface of the cabinets and prepare them for staining.
After you have sanded the cabinets, use a tack cloth to remove any dust or debris. This will help to ensure that the stain will adhere to the cabinets properly.
Step 2: Apply the Stain
Once the cabinets are prepared, you can begin applying the stain. Use a foam brush or rag to apply the stain in thin, even strokes. Be sure to follow the direction of the wood grain. Allow the stain to dry for the amount of time specified on the can.
If you are using a light-colored stain, you may need to apply multiple coats to achieve the desired color. Allow each coat to dry completely before applying the next.
Step 3: Apply the Polyurethane Finish
Once the stain has dried, you can apply the polyurethane finish. Polyurethane is a clear finish that will help to protect the stain and give the cabinets a durable finish. Apply the polyurethane finish in thin, even strokes using a clean rag.
Allow the polyurethane finish to dry completely before using the cabinets. This may take several hours or even overnight.
Tips for Staining Honey Oak Cabinets
- Test the stain on an inconspicuous area before applying it to the entire cabinet. This will help you to ensure that you are happy with the color and finish.
- Use a light touch when sanding the cabinets. Sanding too aggressively can damage the wood.
- Be sure to remove all of the dust and debris from the cabinets before staining. This will help to ensure that the stain adheres properly.
- Apply the stain in thin, even strokes. Avoid applying too much stain, as this can cause the finish to be uneven.
- Allow the stain to dry completely before applying the polyurethane finish. This will help to ensure that the finish is durable.

Before After A Honey Oak Cabinet Refinished Ehow

Staining Oak Cabinets An Espresso Finish Faq S Monica Benavidez

Honey Oak Cabinets Re Stained With Java Gel Stain Kitchen Redo Makeover

Easy Gel Stain For Those Oak Cabinets 320 Sycamore

How To Upgrade Dated Honey Oak Cabinets Hometalk

How To Update Oak Cabinets With Briwax Honey Stained Kitchen Updating

Honey Oak Cabinets Toned With Dye Stain General Finishes Design Center

Gel Stain Color Recommendations

Honey Oak Cabinets Restained With Genera Finishes American Gel Stain Are Just A Shade Kitchen Remodel

How To Glaze Cabinets With Gel Stain Adventures Of A Diy Mom
Related Posts